Hello readers ♥
As promised earlier here is a little guide to how you find the right corrector for you. Are you tired of looking tired (did you see what I did there? Hehe)? Are you bothered by old scars and blemishes on your skin? Can you not get rid of the dark circles around your eyes? Do you see hyper pigmentation or discoloration? This is your go-to product!
I was first introduced to colour correcting when one of my friends were taking a cosmetology course and used me as a model for educational purpose. She told me about the wonders of colour correcting! I have to say this is my favourite cosmetic product. I can not believe how I have missed this for so many years. It totally changes your make up experience! Thanks to Aishu Ram for introducing me to this make-up miracle!
Concealing vs. Colour Correcting
The difference between concealing and correcting is said in the words. When concealing you cover and hide dark circles, blemishes, spots and scars. This can sometimes result in areas of your skin looking ashy. This is where the corrector comes in. When correcting you use the complementary colour of whatever discoloration your skin has and neutralize it.
How does colour correcting work?
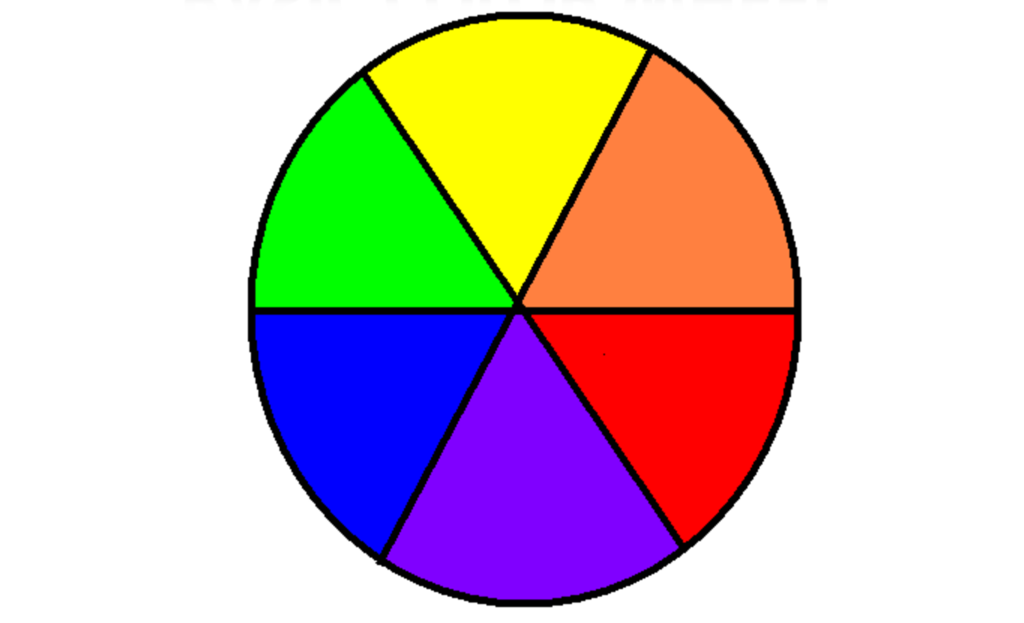
When using the art of colour correcting we have to think back to our school years. Does the colour wheel ring a bell? Primary colours and their complementary colours? This old wheel is the foundation for the colour correcting formular.
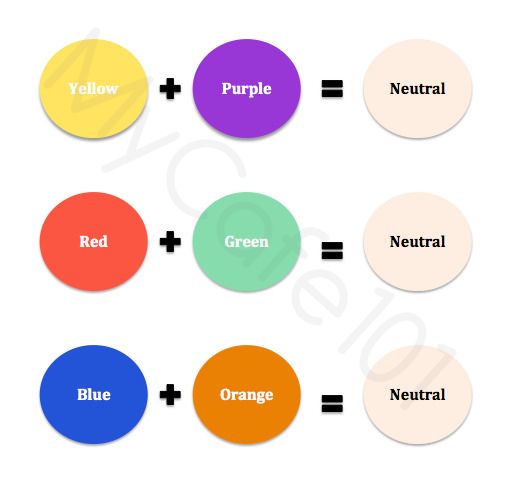
For instance if you have purple blemishing a yellow corrector will neutralize the purple because it is its complementary colour. Or if you have dark/blue cirkles under your eyes an orange corrector can neutralize this because orange is the complementary colour of blue. Now you might think that I am writing nonsense since you dont intent to look like an orange because you tried to colour correct according to what I have written, but you will be surprised how neutral your skin will look if you use the right corrector. And of course you can use your concealer after correcting which gives you the perfect finish and no dull tones(due to the corrector!!). The picture below illustrates how primary and complementary colours neutralize each other.
I have two favourite colour correcting products
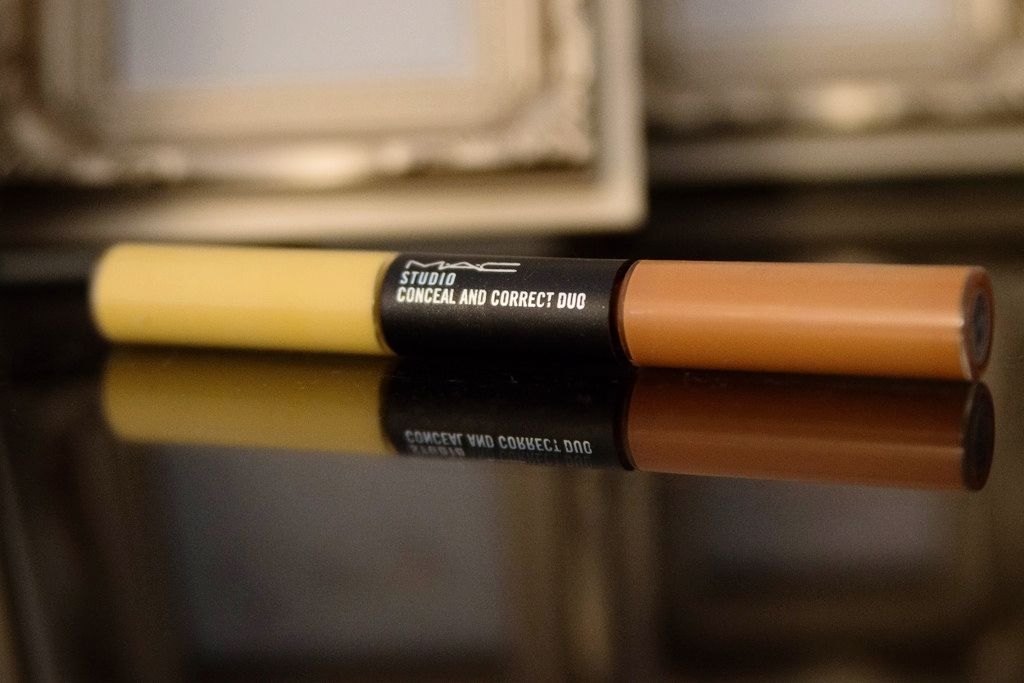
The MAC cosmetics: Studio Conceal and Correct Duo (I use the “Rich Yellow/Burnt Coral”):
The MAC cosmetics: Prep and Prime Liquid Highlighters (I use the “Peach Lustre”):
Both products are absolutely worth the investment. The “Conceal and Correct Duo” I use when I have plenty of time to get ready for a special occasion since this takes a bit more technique to apply because of the concentrated pigmentation. This corrector will last up to 8 hours, is waterproof, fragrance-free and won’t block you pores.
The “Prep+Prime” I can easily use without even using a concealer on top because the pigmentation isn’t as rich as the first one. It is applied precisely and easily and is ideal to use when you need a touch up on-the-go. It works both as a primer/corrector and as a highlighter.
If I had to chose? I can’t. I genuinely think both products are equally good. I should add that you can get a palette from MAC cosmetics as well called MAC Studio Conceal and Correct Palette. This palette contains two correctors and 4 concealers. This is ideal to buy if the right corrector and concealer are in the same palette but that isn’t the case for me. If I had to buy it I would need a Medium Palette for the concealers and a Medium Deep for the correctors. The palettes are almost double the price of the two products listed above so for me it wouldn’t be a worth the investment.
Testing it on moi ;)
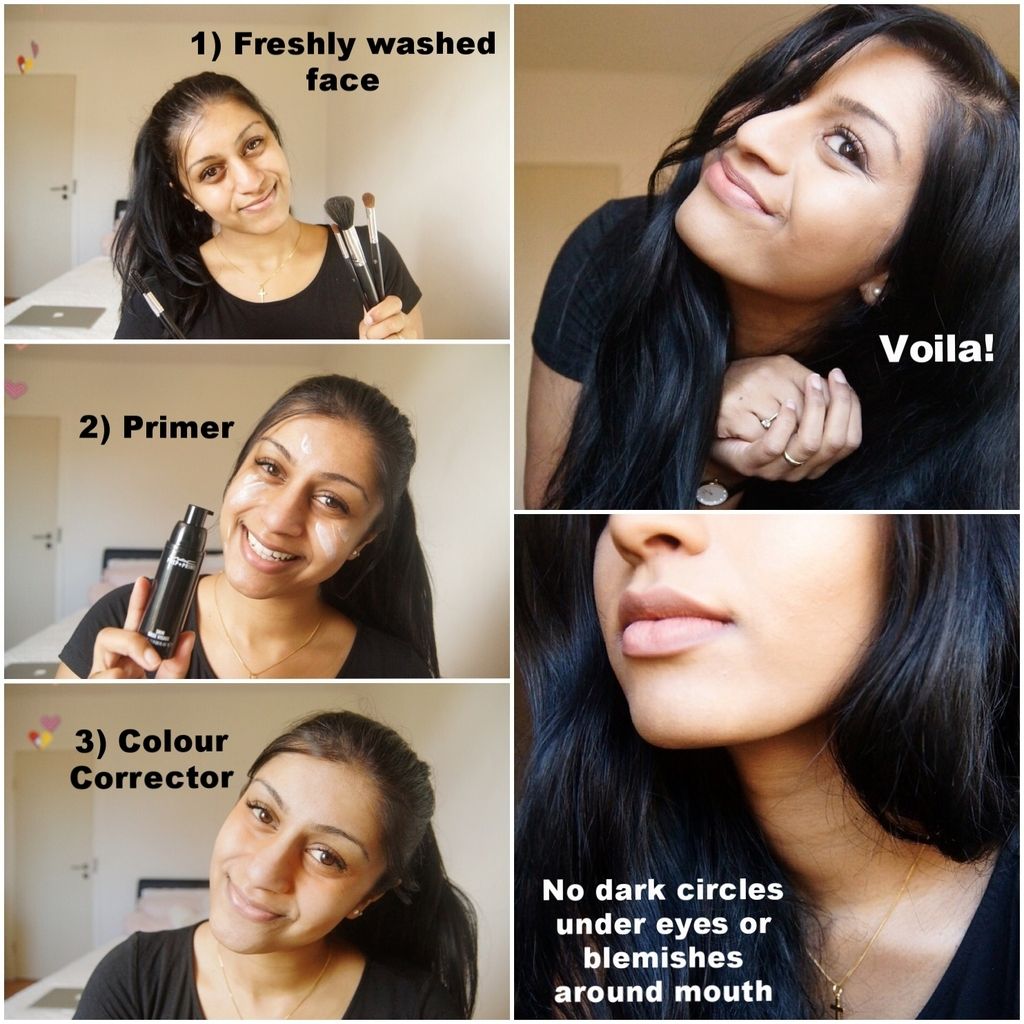
Here is a quick step-by-step guide showing the difference that the colour corrector makes. As you can see I am very very very tired since I decided to test this after only a couple of hours of sleep so excuse the huge bags under my eyes and try (if possible!!) to focus on the different pigmentation in my skin. For me it’s mainly the hyper pigmentation around the corners of my lips and the dark circles under my eyes that needs colour correcting. On picture 3) you can clearly see how I dapped on the corrector and how this is giving me an orange tone under the eyes. Following this I used concealer under the eyes, foundation on the rest of the face and a nude lipliner. Done. Bye bye hyper pigmentation!
This is it for this time’s “The science of make-up”. Feel free to keep sending requests. We love when our posts are useful to the followers.
Have a lovely day x
Delany ♥
Used products
- Face wash: Proactive Solution Medicated Cleansing Bar for face and body
- Face creme: Clinique Dramatically Different Moisturizing Gel
- Eye creme: Bobbi Brown Eye Repair Creme
- Face primer: MAC cosmetics Prep + Prime Skin: Base Visage
- Colour Corrector: MAC Cosmetics Prep + Prime Highlighter: Peach Lustre
- Foundation: MAC Cosmetics Studio Fix Fluid SPF 15: NC40
- Concealer: MAC Cosmetics Matchmaster concealer: 4
- Lipprimer: Mac Cosmetics Prep + Prime Lips
- Lipliner: Mac Cosmetics Lip Pencil: Have to have it
